How to Make a Paper Airplane – A How to Guide & 5 Fun Models
How to Make Paper Airplanes – Top 5 Fun Paper Airplane Instructions
So, you want to learn how to make a paper airplane? Whether it’s to entertain yourself during a dull moment, bond with your kids, or even engage in some aerodynamic experiments, paper airplanes are a fascinating subject.
This guide not only teaches you how to fold paper into airplanes but also sprinkles in some scientific principles that make your paper creations soar.
These paper airplane designs are a great way to add a little levity to your day. The examples below are all beginner level and visually show how to properly fold a paper airplane for best results.
For advanced paper airplane making techniques click here.
The Science of Flight: Easy-to-Understand Explanation
Before you start making your paper airplane, let’s talk about the forces that help airplanes fly in the first place.
There are four main “forces” or pushes and pulls that help or stop your paper airplane from flying. These are lift, gravity, thrust, and drag.
- Lift: Lift is like the magic that helps the airplane go up. When you throw your paper airplane, the wings help it go up into the air and stay there. Bigger wings or wings that are tilted a bit can help your airplane go up higher or stay in the air longer.
- Gravity: Gravity is the force that tries to pull everything down to the ground, like when you drop a ball. For your paper airplane to fly, it needs to have enough lift to fight against gravity. That’s why getting the wings just right is so important.
- Thrust: Thrust is the push that gets your airplane moving. For paper airplanes, you give them thrust when you throw them. A good, strong throw can make paper airplane fly far and do cool tricks. But be careful, throwing it too hard might make it flip or crash.
- Drag: Drag is what slows down your airplane. It’s like when you try to walk through water; the water pushes against you and tries to slow you down. In airplanes, a pointy nose and smooth shape help it cut through the air and not get slowed down too much.
Adding up the Forces – Making It All Work Together
The best flights happen when these four forces work well together. If there’s too much drag or gravity, your paper airplane will fall quickly. If there’s not enough lift, it won’t fly high. And if you don’t give it a good enough throw, it won’t go very far.
So when you’re making and flying your paper airplanes, remember that you’re like a young scientist or pilot. You’re learning about how things fly, and that’s pretty cool! Happy flying!### The Science of Flight: Easy-to-Understand Explanation
Materials You’ll Need
The materials are cheap and readily available:
- 8 1/2 x 11-inch paper: Standard printer paper works well.
- Scissors: For creating control surfaces and fine-tuning.
- Ruler: Essential for precise folds.
- Double-sided tape: Optional but useful for improving flight dynamics.
DIYC TIP: For best results use a flat, thin-edged ruler. Make good creases along each edge. Adding double stick tape to the inside of the body keeps the wings from separating in flight.
1. THE DART Paper Airplane
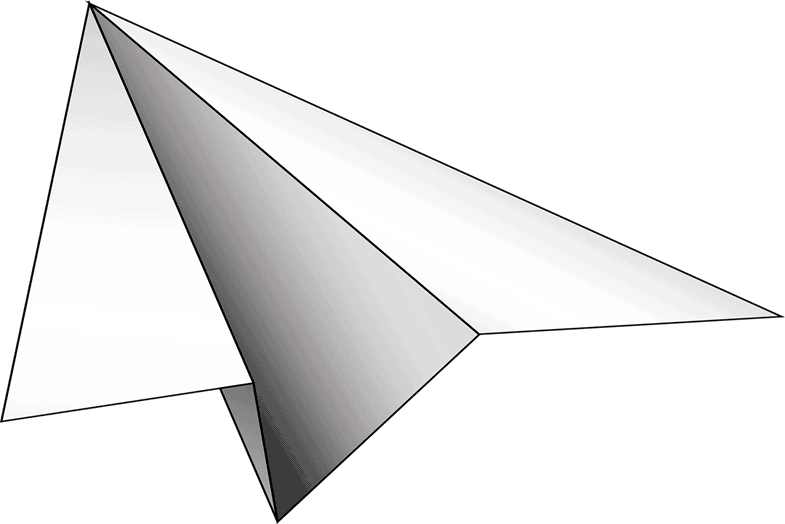
The dart paper airplane is one of the most basic and simple patters to learn and teach. This design was my favorite for years as a kid, and still enjoy making as an adult. The dart’s shape and design make for a fast airplane model. If you feel the need for speed, then this is the design you need.
The Dart is the classic paper airplane model known for speed and stability. It has a pointed nose and straight wings, contributing to its fast flight characteristics.
How to Make the Dart Paper Airplane
Follow these steps to fold your Dart paper airplane:
- Prepare the Paper: Lay your paper on a flat, even surface, vertically oriented.
- Fold in Half: Fold the paper vertically, ensuring the fold aligns perfectly to create the backbone of your plane.
- Fold the Top Corners: Unfold the paper half and fold each of the top corners into the center line, forming a triangle.
- Fold the Top Edges: Fold top edges into the center line.
- Fold the Plane: Fold plane in half along the center line.
- Fold the Wings: Fold the wings down so that the top edges align with the bottom edge of the body.
- Add Tape: Optional but recommended, add some double-sided tape to the inside of the body for added stability.
DIYC TIP: Add control surfaces for added stability and control
Control surfaces can improve stability on any airplane design – you can fold them up or down to increase or reduce lift, or force a gliding turn
Science Behind the Dart
The Dart is designed for speed. Its pointed nose reduces air resistance, allowing it to cut through the air efficiently. The straight wings provide enough lift while minimizing drag.
ADDING CONTROL SURFACES
- Fold the trailing edges of each wing towards the middle line.
- Unfold them back to level.
- Start with small, upward bends near the plane’s backbone, adjusting as necessary for improved flight dynamics.
Pro Tip: Control surfaces are small folds or cuts on the wings that help to stabilize and control the plane’s direction during flight.
2. THE STEALTH Paper Airplane
The stealth paper airplane is also a simple design to learn; however, this model is built more for distance vs. speed.
How to Make the Stealth Paper Airplane
- Lay the paper on an even flat surface vertically
- Fold the paper in half vertically – this creates the “backbone” for the plane – so be sure to fold exactly in half
- Unfold the paper then fold each of the top corners into the center line.
- Measure 3/4 inches from the bottom of the paper, then fold the peak toward you and to the 3/4 in. mark
- Fold the top corners into the center line.
- Fold the remaining tip (from step 4) over the two flaps at the center line to lock them in place
- Fold the plane in half away from you – if done correctly, then the tip from step 6 should lock the flaps in place
- Using your ruler, measure a mark 1 inch up from the center, then fold the wings down to your mark.
- Fold up the sides of each wing 1/2” tall to create vertical stabilizers
ADDING CONTROL SURFACES
- Measure 1/4 in. from the small vertical wings, then cut two small slits 1/4 in. deep and 1 apart, at the back of each wing
- Fold up the tabs to expose the control surfaces
- Measure 2 inches along the middle from the front to locate the planes’s center of gravity (CG)
- Add double-sided stick tape to the inside of the body at the CG location.
- The finished plane should look like this.
DIYC TIP: The center of gravity (CG) is the physical location where a plane is perfectly balanced. Adding weight (e.g., double-side tape) before or after the CG, can affect the plane’s performance – Keep it simple by adding the tape as close as possible to the CG.
THE BUMBLE Paper Airplane
The bumble paper airplane is yet another simple design to master. And just like it’s cousin the stealth, this model is built more for distance.
The bumble gets its name from it’s bee-like design. Built correctly, this bad boy can soar for extended periods.
MAKING IT
- Lay the paper horizontally on an even flat surface
- Fold the paper in half horizontally – this creates the “backbone” for the plane – so be sure to fold exactly in half
- Unfold the paper half then fold each of the top corners into the center line.
- Fold the peak down to meet the edge of the previous fold.
- Fold the outer sides into the center line.
- Fold the top edge 1/2 inch away from you.
- Fold the plane in half towards you.
- Fold the wings down 1/2 inch from the bottom of the plane.
- Add double stick tape to the inside of the body. The finished plane should look like this.
